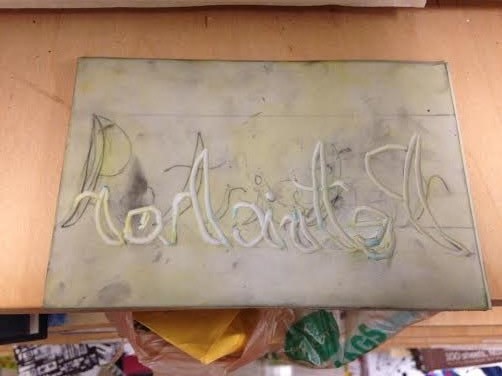
Searching all over the internet on how to spell the word I found it, it is a Linoleum cut out, but through these instructions I will call it a Linocut. A Linocut is like a stamp, a print making technique, it has this rubbery base, you use these special tools to carve designs into it. Just like a stamp you put special ink on it then smash it on paper to transfer the design in color. Below is a picture of what a Linocut looks like with carvings in it.
1.) First step is to get a plain Linocut
2.) You get a piece of paper and draw out your design, if you do a word don't forget to draw it backwards so when you press it later on it will be going left to right not right to left (you make that mistake many times.)
3.) Once you have your design flip the design side of the paper onto the Linocut, take a graphite pencil and shade the back of the paper. Once that is done you can remove the sheet of paper and the design has transferred onto the Linocut.
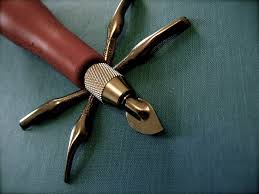
4.) Take out your cutting tools.
2.) You get a piece of paper and draw out your design, if you do a word don't forget to draw it backwards so when you press it later on it will be going left to right not right to left (you make that mistake many times.)
3.) Once you have your design flip the design side of the paper onto the Linocut, take a graphite pencil and shade the back of the paper. Once that is done you can remove the sheet of paper and the design has transferred onto the Linocut.
4.) Take out your cutting tools.
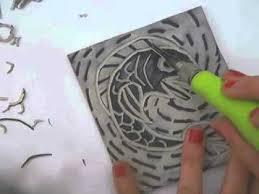
5.) Now you will start carving the lines of your design, by doing this you are making it 3D, the 3D part will be the colored part once you press it later on. The lines that you are carving out will show up without any ink.
6.) Once you are done with your carving the fun part comes, INK!!! Warning: does not come out of clothes and if you are a messy person like I am then you will get it all over you. Get out your inking supplies out and make sure they are clean.
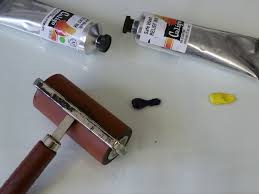
7.) Alright now use your roller and roll out the color ink that you chose ( you can use more then one color to get a mixture look) once you have a good layer of ink on the roller you are ready. Make sure it is not thick on the roller or it will smudge the finale piece of art.
8.) Take your Linocut and roll a layer of the ink on the top surface, once you think you have enough put the roller down.
9.) Take your piece of paper that you are going to use, carefully flip the Linocut over and carefully plop it onto the paper.
10.) Press all around to make sure the ink transfers onto the paper, then slowly peel it off and viola! you have successfully did a Linocut.
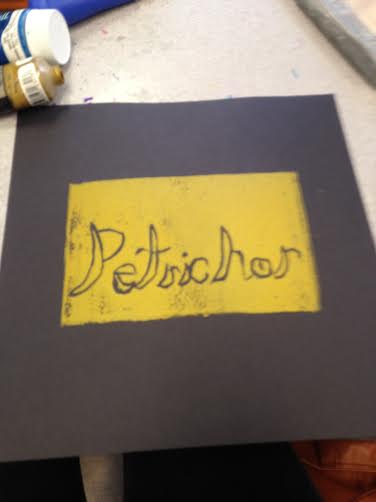
This is my finale piece of work, sometimes you have to do more then one to get it to fully transfer, other then that it is fairly simple and can be a messy but fun art project to do.

 RSS Feed
